Single Sign-on (SSO) is a one-step user authentication process. If you are the admin of a HelpDesk account, you can set up SSO with the identity providers (IdP) of your choice. Your technicians can access HelpDesk using the IdP credentials without another password to manage.
Admin of a HelpDesk account can configure SSO to access HelpDesk by signing in to a central identity provider. To set up SSO, you need to first configure your identity provider and then configure your HelpDesk account.
To configure SSO for your HelpDesk account,
- Login to HelpDesk via web browser.
- Clique no nome de usuário exibido no canto superior direito e clique em "My Account" (Minha conta).
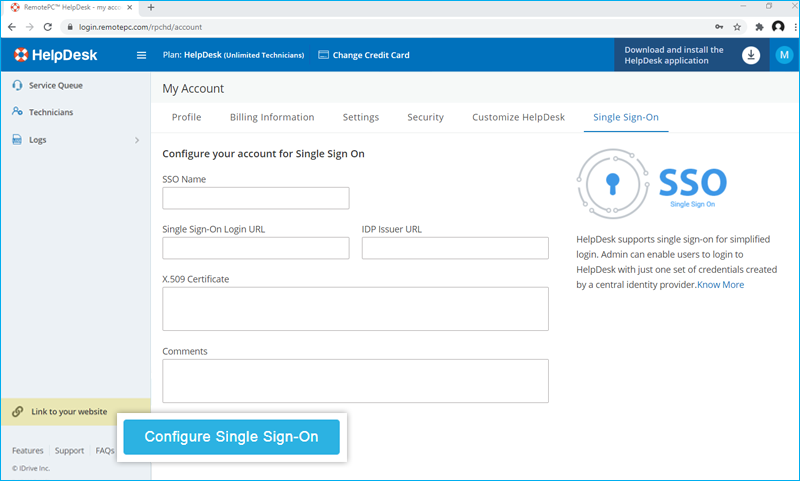
- Clique em "Single Sign-On".
- Digite um nome para seu perfil SSO.
- Insira os URLs e adicione o certificado X.509 recebido de seu IdP.
Observação: O certificado X.509 só deve estar no formato .pem ou .cer. - Clique em "Configure Single Sign-On" (Configurar logon único).
Você receberá um e-mail quando o SSO for ativado.
Admin of HelpDesk accounts can either select SSO for login while inviting technicians to create an account or enable SSO for existing technicians.
To invite technicians to use SSO,
- Log in to HelpDesk via web browser.
- Go to the 'Technicians' tab and click 'Add'.
- Enter the email address in the 'Email Address' field.
- Select group and other preferences for the technician.
- Selecione "Enable SSO" (Ativar SSO).
Note: If you select the checkbox, technicians won't have to set a password for their account.
- Click 'Invite'.
To enable SSO for existing technicians,
- Login to HelpDesk via web browser and go to the 'Technicians' tab.
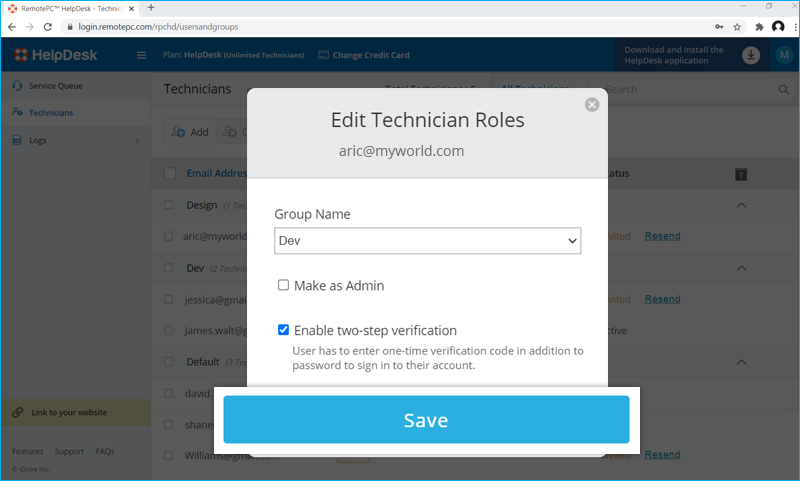
- Hover on the technician you want to edit and click
 .
. - Selecione "Enable SSO" (Ativar SSO).
- Clique em "Salvar".
Sim, os administradores podem remover um perfil SSO de suas contas.
Para remover o perfil SSO,
- Login to HelpDesk via web browser.
- Clique no nome de usuário exibido no canto superior direito e clique em "My Account" (Minha conta).
- Clique em "Single Sign-On".
- Clique em
 correspondente ao perfil SSO que você deseja excluir.
 - Click'Delete' in the confirmation popup to remove the SSO profile.
Deleting the SSO profile will remove Single Sign-On for all technicians linked with this profile and they will have to use their registered email and password for login.
To disable SSO for a technician,
- Login to HelpDesk via web browser and go to the 'Technicians' tab.
- Hover on the technician you want to edit and click .
- Desmarque a caixa de seleção "Enable SSO" (Ativar SSO).
- Clique em "Salvar".
Caso você desative o logon único para um usuário, ele precisará definir uma nova senha para sua conta. Depois disso, o usuário deverá usar seu endereço de e-mail e a nova senha para fazer login.
Sim, você pode configurar seu próprio provedor de identidade para SSO junto com um conjunto de parâmetros, conforme descrito abaixo:
- HelpDesk uses SAML2 with the HTTP Redirect binding for HelpDesk to IdP and expects the HTTP Post binding for IdP to HelpDesk.
- Ao configurar com SAML, use os seguintes URLs e salve as alterações.
- Single sign on URL:
https://www.remotepc.com/rpchd/sso/process - Audience URL (SP Entity ID):
https://www.remotepc.com/rpchd/sso/metadata
- Single sign on URL:
- Seu provedor de identidade pode perguntar se você deseja assinar a asserção SAML, a resposta SAML ou ambas.
To login in to SSO enabled account via desktop,
- Clique em "Single Sign-On (SSO)" na tela de login.
- Enter 'Email Address' and click 'Login'. You will be redirected to IdP web login page.
- Digite o nome de usuário e a senha registrados no IdP, quando solicitado a inserir as credenciais.
Upon successful validation of identity, you will be prompted to go back to the desktop application and you can now continue using your HelpDesk account.
Para fazer login na conta habilitada para SSO via desktop,
- Clique em "Single Sign-On (SSO)" na tela de login.
- Digite o "Endereço de e-mail" e clique em "Login". Você será redirecionado para a página de login na Web do IdP.
- Digite o nome de usuário e a senha registrados no IdP, quando solicitado a inserir as credenciais.
Upon successful validation of user identity, you will be prompted to go back to the desktop application and you can now continue using your HelpDesk account.